Get best WooCommerce Plugins > Instagram stands out among tons of social media platforms as…
Configuring WooCommerce Store General Settings in WordPress
Configuring WooCommerce Store General Settings continues from the first tutorial. We have seen How to install WooCommerce in just 5 minutes and make your Online Store ready. We have also learnt some of the basic settings which come bundled with WooCommerce Setup Wizard. In most cases, they are more than sufficient to start with. But as you move ahead, you will find that you will need to jump into WooCommerce Store Settings for advanced features.
Here is a step by step picture tutorial for configuring WooCommerce General Settings and we have added some Optimisation Tips (FREE!).
Step 1: Finding Woocommerce General Setting Screen
First go to WordPress Menu —> WooCommerce (E-Store) —> Settings and click on ‘Settings’. This will take you to the default WooCommerce General Setting screen that looks as on the picture below.

By default, when you reach the WooCommerce Settings page, the General Settings tab is open. This makes it very easy to handle. In this tutorial we will be learning about General Settings only. The General Settings Tab looks as on the picture below. (For an advanced introduction into WooCommerce Configuration and additional Optimisation Tips, please Contact us or order a Hourly Support Plan.)
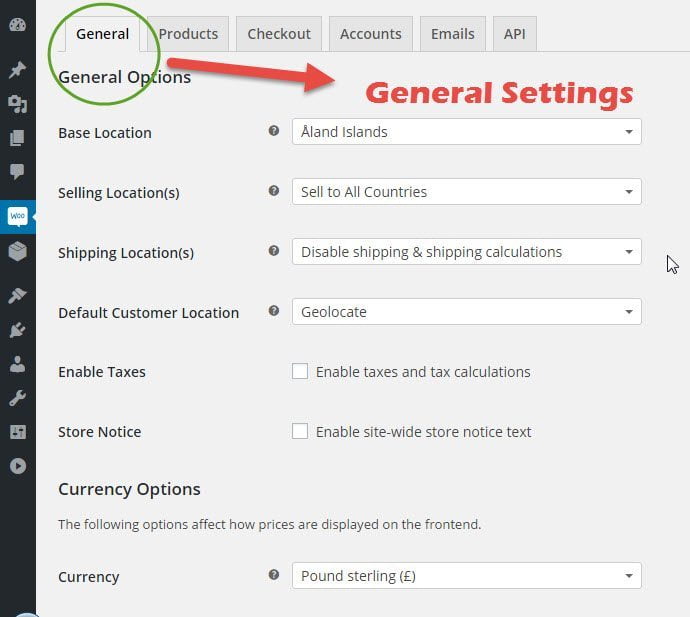
Step 2: Configuring WooCommerce General Settings
There are 12 available options in the WooCommerce General Settings and they are mainly targeted towards your and your customers location. These settings will ultimately affect to whom you sell, how you sell, how you ship and how you accept payments.
Let’s look at these settings one by one.
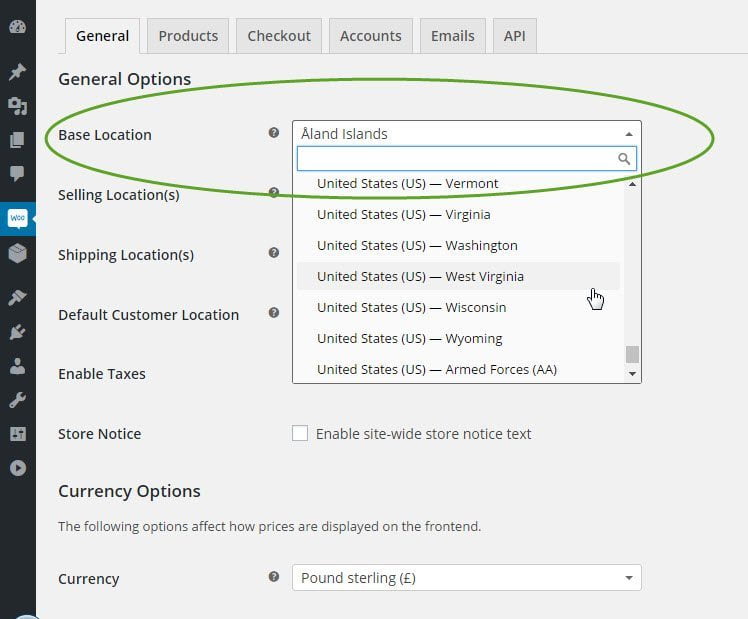
In Base Location setting, you will define location of your store. This setting defines where you are located and from where you will be shipping your items. This will ultimately affect your shipping rates so choosing correct and right option from drop-down is most important unless you are selling digital or virtual goods (digital images, online services, online courses etc). Accessibility is of high importance of every successful online store.
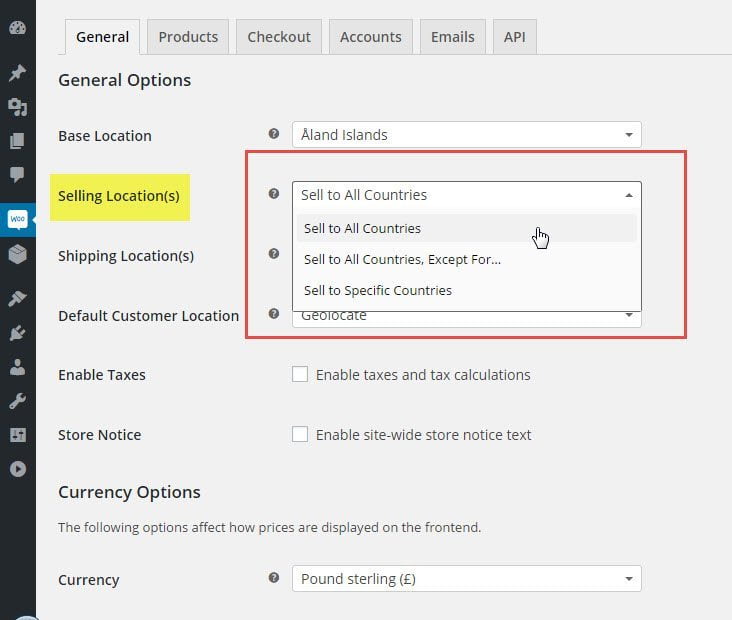
Here, you can define to which countries you are selling. You can select options like weather you sell to all countries or just to the limited number of countries. If you have a huge list of countries where you do not ship, please select last option and if number is less select second option. In both these options, you will set up countries list on selecting option. Accessibility is of high importance of every successful online store.
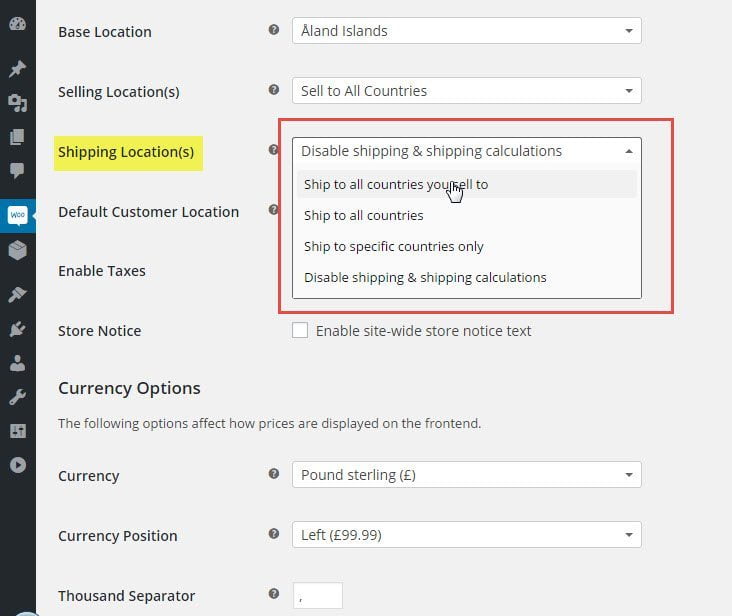
Shipping Locations option is generally the same as Selling Locations but if they are different, you can specify that here.
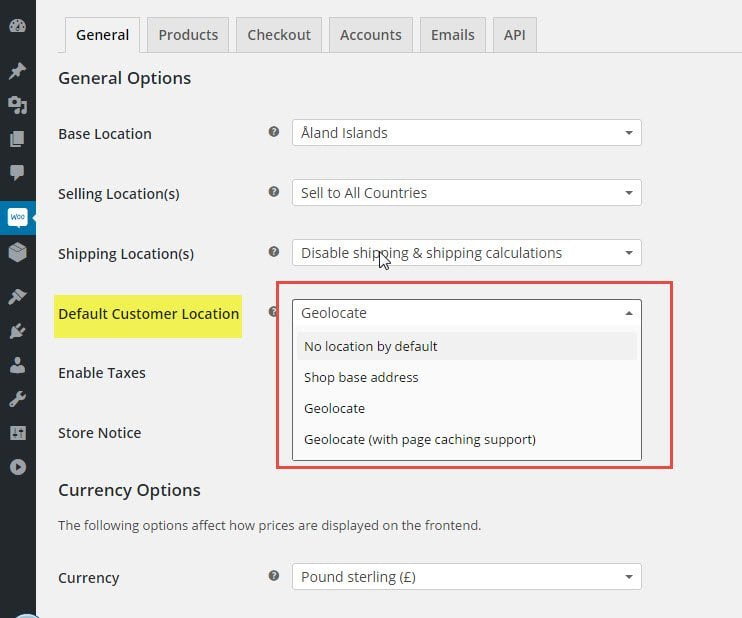
Geolocation of your customer will allow you to identify customers location. It will also fill country field on the checkout page automatically. So your customers will save little time during checkout. We recommend to use Geolocation service as it also helps in avoiding frauds. (There are several options available for Default Customer Location, with each affecting the site responsiveness in a different way. Contact us for more information on right setting for your store.)
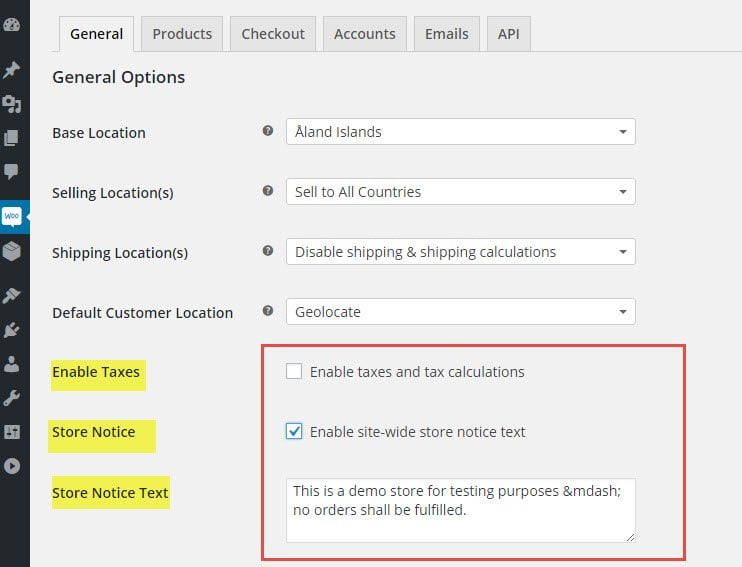
Enable Tax option mainly depends on your business, location and accounting practices. It will be your choice weather you want to rely on WooCommerce for taxation purposes or if you want to use some other professional services.
Store Notice Text settings will allow you to define a store-wide notices. You can see the example in above picture but it can be anything from information for customer to promotional messages.
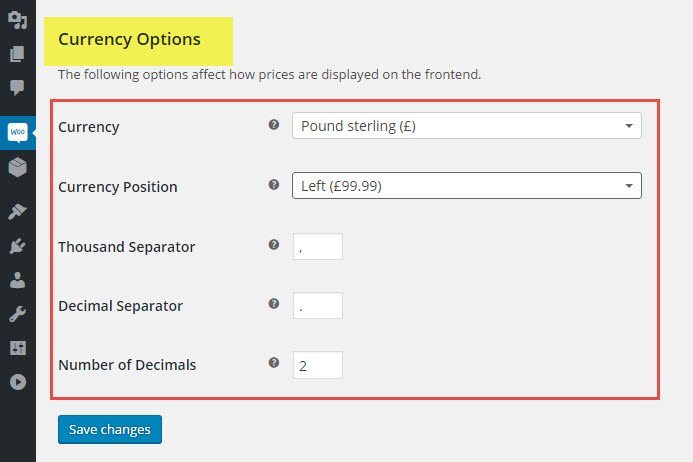
Step 3: Configure WooCommerce Store’s Currency options
The image below is self explanatory and you have 5 available options to choose from. Once you have set up the Currency Options, click ‘Save Changes’ button and your General Settings are now configured.
After your WooCommerce Store is properly setup and after you will start selling first products there are numerous ways to create ongoing relations with your customers – some of which we publish Freely on our Social Media Blogs or additional optimisation tips that are included with our Monthly Support Plans.
Remember, you can always come back to WooCommerce Settings and change them if required in the future.
Would you like to know more on WooCommerce Settings and Optimal Configuration for your Online Store? Then Contact us or follow the info below. Thanks!
[wpseo_map width=”100%” height=”300″ zoom=”-1″ map_style=”roadmap” scrollable=”0″ draggable=”1″ show_route=”0″ show_state=”1″ show_url=”0″] [wpseo_address hide_address=”1″ show_state=”1″ show_country=”1″ show_phone=”1″ show_phone_2=”0″ show_fax=”0″ show_email=”1″ show_url=”1″ show_logo=”0″ show_opening_hours=”1″]
2.
Configuring WooCommerce Store General Settings in WordPress
Related Articles