


Get best WooCommerce Plugins > Instagram stands out among tons of social media platforms as…
How to Stop Search Engines from Crawling a WordPress Site
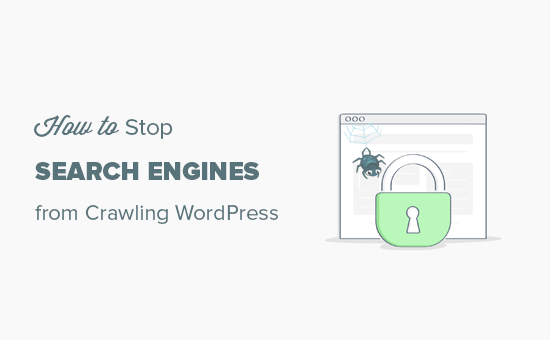
Recently, one of our users asked us how they can stop search engines from crawling and indexing their WordPress site? There are many scenarios when you would want to stop search engines from crawling your website or listing it in search results. In this article, we will show you how to stop search engines from crawling a WordPress site.
Why and Who Would Want to Stop Search Engines
For most websites, search engines are the biggest source of traffic. You may ask, why would anyone want to block search engines?
When starting out, a lot of people don’t know how to create a local development environment or a staging site. If you’re developing your website live on a publicly accessible domain name, then you likely don’t want Google to index your under construction or maintenance mode page.
There are also many people who use WordPress to create private blogs, and they don’t want those indexed in search results because they’re private.
Also some people use WordPress for project management or intranet, and you wouldn’t want your internal documents being publicly accessible.
In all the above situations, you probably don’t want search engines to index your website.
A common misconception is that if I do not have links pointing to my domain, then search engines will probably never find my website. This is not completely true.
There are many ways search engines can find a website linked elsewhere. For example:
- Your domain name could have been previously owned by someone else, and they still have some links pointing to your website now.
- Some domain search site’s results could get indexed with your link on them.
- There are literally thousands of pages with just list of domain names, your site can appear on one of those.
There are a lot of things happening on the web and most of them are not under your control. However, your website is still under your control, and you can instruct search engines to not index or follow your website.
Blocking Search Engines from Crawling and Indexing Your WordPress Site
WordPress comes with a built-in feature that allows you to instruct search engines not to index your site. All you need to do is visit Settings » Reading and check the box next to Search Engine Visibility option.

When this box is checked, WordPress adds this line to your website’s header:
<meta name='robots' content='noindex,follow' />
WordPress also modifies your site’s robots.txt file and add these lines to it:
User-agent: *
Disallow: /
These lines ask robots (web crawlers) not to index your pages. However, it is totally up to search engines to accept this request or ignore it. Even though most search engines respect this, some page or random image from your site may get indexed.
How to Make Sure Your Site Doesn’t Appear in Search Results?
The default WordPress visibility settings instruct search engines not to index your website. However, search engines may still end up crawling and indexing a page, file, or image from your website.
The only way to to make sure that search engines don’t index or crawl your website at all is by password protecting your entire WordPress site on the server level.
This means when anyone tries to access your website, they are asked to provide a username and password even before they reach WordPress. This includes search engines as well. Upon login failure, they are shown 401 error and the bots turn away. Here is how to password protect an entire WordPress site.
Method 1: Password Protecting an Entire Site using cPanel
If your WordPress hosting provider offers cPanel access to manage your hosting account, then you can protect your entire site using cPanel. All you have to do is log in to your cPanel dashboard and then click on ‘Password Protect Directories’ icon under the ‘Security’ section.

Next, you will need to choose the folder where you have installed WordPress. Usually, it is the public_html folder.

If you have multiple WordPress sites installed under public_html directory, then you need to click on the folder icon to browse and select the folder for the website you want to password protect.
On the next screen, you need to enter a name for the protected directory and click on the ‘Save’ button.

Your information will be saved and cPanel will reload the page. After that, you need to add an authorized user by entering a username and password.

That’s all, you have successfully added password protection to your WordPress site.
Now, whenever a user or search engine visits your website they will be prompted to enter the username and password you created earlier to view the site.

Method 2: Password Protecting WordPress with a Plugin
If you are using a managed WordPress hosting solution, sometimes you don’t have access to cPanel.
In that case, you have the option to use different WordPress plugins to password protect your website. Below are the two most popular solutions:
- SeedProd – it’s the #1 coming soon and maintenance mode plugin for WordPress, used on over 800,000+ websites. It comes with complete access control and permissions features that you can use to hide your website from everyone including search engines. We have a step by step how-to guide for SeedProd.
- Password Protected – it’s a very simple way to password protect your WordPress site with a single password (no user creation needed). See our step by step guide on how to password protect a WordPress site.
- Sale
Connect 365/7/24 Hourly Support
Original price was: $120.00.$99.00Current price is: $99.00. - Sale
Connect Auto-Pilot for WordPress Content Management
Original price was: $599.00.$499.00Current price is: $499.00. - Sale
%22%20transform%3D%22translate(1.8%201.8)%20scale(3.63281)%22%20fill-opacity%3D%22.5%22%3E%3Cpath%20fill%3D%22%23c2ffee%22%20d%3D%22M204.4%20130.6l1.2%2072-158%202.8-1.2-72z%22%2F%3E%3Cellipse%20fill%3D%22%23c4ffef%22%20cx%3D%22122%22%20cy%3D%2272%22%20rx%3D%2283%22%20ry%3D%2235%22%2F%3E%3Cellipse%20fill%3D%22%23beffea%22%20cx%3D%2265%22%20cy%3D%22126%22%20rx%3D%2235%22%20ry%3D%2256%22%2F%3E%3Cellipse%20fill%3D%22%2388ccb5%22%20rx%3D%221%22%20ry%3D%221%22%20transform%3D%22matrix(51.92988%20-137.38378%2059.61857%2022.5353%20255%20209.3)%22%2F%3E%3C%2Fg%3E%3C%2Fsvg%3E) Select options This product has multiple variants. The options may be chosen on the product page
Select options This product has multiple variants. The options may be chosen on the product pageConnect WordPress Maintenance Plans
$99.00 – $224.00
Related Articles