
Get best WooCommerce Plugins > Instagram stands out among tons of social media platforms as…
18 Most Important Things You Need to Do After Installing WordPress
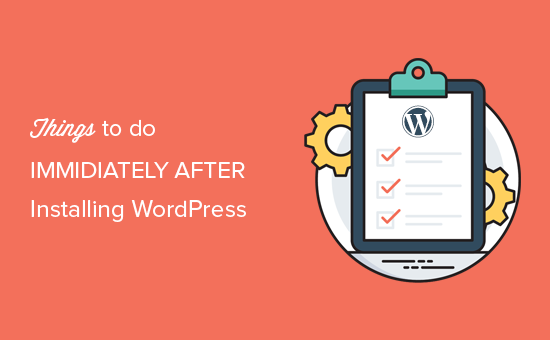
We are often asked by users about what to do right after starting a blog? Once you have installed WordPress, there are still quite a few things you need to do to properly setup and launch your website. In this article, we will share the most important things that you will immediately want to do after installing WordPress.
1. Add a Contact Form
All websites on the internet need a contact form. It allows your website visitors to quickly contact you by simply filling out a form on your website.
By default, WordPress does not come with a built-in contact form.
This is where WPForms comes in. It is the best WordPress contact form plugin and allows you to easily create beautiful contact forms for your website.
They also have a WPForms free version that you can download from WordPress.org plugin repository.

See our step by step guide on how to create a contact form in WordPress.
2. Change Site Title, Tagline, and Timezone
Next, you need to change the site title, tagline, and timezone settings. Simply head over to Settings » General page and change these settings.

3. Setup WordPress SEO
SEO, short for Search Engine Optimization, is used by website owners to get more traffic from Google and other search engines.
WordPress is pretty SEO friendly out of the box. However, there is a lot more that you can do to optimize your SEO and get more traffic to your website.
The best time to set up your website’s SEO is right after installing WordPress.
We recommend using the Yoast SEO plugin. It is the most comprehensive WordPress SEO plugin on the market, and it takes care of all the important SEO settings out of the box.

For complete step by step instructions, see our ultimate WordPress SEO guide for beginners.
4. Install Google Analytics
As a website owner, you need to understand your audience, what they are looking for, and how you can help them find it. These insights help you make smarter decisions to grow your business.
This is where you need Google Analytics. It shows you how many people visit your website, where they came from, and what they did on your website.
The easiest way to install Google Analytics is by using MonsterInsights. It is the best Google Analytics plugin for WordPress and shows beautiful analytics reports right inside WordPress.

For the complete setup, see our beginner’s guide on how to easily install Google Analytics in WordPress.
5. Install Caching
Studies show that 1 second delay in page load time can lead to 7% loss in conversions, 11% fewer page views, and 16% decrease in customer satisfaction.

As a website owner, you need to make sure that your website is fast and performs well even under high traffic.
This is where caching comes in. It allows your website to quickly serve cached copies of your pages to users instead of generating them on the fly. This reduces server load on your website and improves your page load speed.
There are a lot of caching plugins available for WordPress, but we recommend using the WP Super Cache plugin. See our guide on how to install and setup WP Super Cache plugin for detailed instructions.
Caching alone can significantly improve your website’s speed. However, there are lots of other things you can do to make it faster. See our complete guide on how to improve WordPress speed & performance.
6. Setup Backups
Each year millions of dollars worth of damages are caused by data loss. Creating backups is the only way to make sure that you can easily recover your website in case of a disaster.
Some WordPress hosting companies offer limited backup services with their hosting plans. However, these backups are not guaranteed, and it is your responsibility to backup your website on your own.
Luckily, there are several great WordPress backup plugins that you can use to automatically create backups.
We recommend using Updraft Plus. It is the best WordPress backup plugin and allows you to setup automatic backup schedules. You can also store your backups securely on remote storage services like Google Drive, Amazone S3, Dropbox, and more.

For step by step instructions see our step by step tutorial on how to backup and restore WordPress using UpdraftPlus
7. Setup WordPress Security
WordPress is quite secure out of the box. However, you still need to follow security best practices to keep your website secure.
Some of these best practices are quite easy to do on your own like using strong passwords, securing WordPress admin area, and installing updates.
For other things, you will need a plugin. There are some great WordPress security plugins that you can use.
We recommend using Sucuri. They are the industry leader in website security, vulnerability scanning, and malware protection.
The best part about using Sucuri, is that they offer the best WordPress firewall plugin. A website firewall blocks suspicious traffic from ever reaching your website.

For complete instructions, follow the steps in our ultimate WordPress security guide for beginners.
8. Setup Spam Protection
Spam comments can be quite problematic. Most of them contain links to malicious websites known for distributing malware. Spam comments can affect your search rankings and your website’s reputation.
You can enable comment moderation in WordPress to prevent any comment appearing without approval. However, as the quantity of spam grows you will be spending considerable time moderating comments.
To fix this, you need to install and activate the Akismet plugin. It is a WordPress anti-spam plugin and one of the only two plugins that come pre-installed on every WordPress website.

To learn more, see our guide on how to setup Akismet anti-spam plugin in WordPress.
9. Delete Unused WordPress Themes
Most WordPress users will install and test a few themes before deciding on one that’s a keeper. Instead of leaving those unused themes installed, be sure to delete them. The reason for that is because even inactive themes will need updates.
We do recommend keeping at least one default theme installed. This theme will act as a fallback in case you have to to switch themes when troubleshooting for errors.
Go to Appearance » Themes page and click on an unused theme that you want to delete. This will bring up a popup showing theme details. In the bottom-right corner of the popup you will see the link to delete the theme.

Repeat the process to delete all unused themes.
10. Setup WordPress Comments
Comments play an important role on most blogs. They are a good indicator of user engagement and allow you to build a community around your blog.
Simply go to Settings » Discussion page to setup comments. From here you can enable or disable comments, setup comment notifications, and enable comment moderation.

11. Delete Default Content
WordPress comes with some default content to be used as the placeholder items. This includes a blog post titled ‘Hello World’, a sample comment, and a sample page.
Simply go to Posts » All Posts page. Take your mouse to the ‘Hello World’ post and then click on the ‘Trash’ link.

Next, go to Pages » All Pages page and then delete ‘Sample Page.
Lastly, visit the Comments page and then delete the default comment.

12. Setup a Default Category
WordPress posts are required to be filed under at least one category. By default, WordPress uses the ‘Uncategorized’ category as the default category. If you don’t change the category when writing a blog post, then it will automatically be filed under the default category.
To change the default category, first, you need to visit Posts » Categories page to create a new category. This will be used as your new default category.

After that, go to Settings » Writing page. Here you will see the default category option, you can go ahead and select the new category you created earlier.

Finally, you can go to Posts » Categories page and delete the ‘Uncategorized’ category.
To learn more, see our guide on how to change the default Uncategorized category in WordPress.
13. Setup Front and Blog Pages
By default WordPress displays your blog posts on the homepage. However, if you are making a small business website, then you would want to use a static page as your homepage.
Even most blogs want to use a static front page as their homepage. This allows them to create custom layouts for their homepage.
To set up these pages, you can simply go to Settings » Reading page and select the pages you want to use as your front page and blog page.

For more details, see our article on how to add a separate page for blog posts in WordPress.
14. Upload Your Gravatar
WordPress uses Gravatar to display user photos in author bios and in WordPress comments. Gravatar is a profile image hosting service that allows users to use the same photo as their profile image across millions of website.

Simply go to the Gravatar’s website and create an account using the email address you have used in your WordPress account.
After that, you can use this email address to comment on millions of websites using Gravatar including your own site.
For more details, see our article on how to use Gravatar in WordPress.
15. Complete Your User Profile
Next, you would want to complete your WordPress user profile. Simply head over to Users » Your Profile page to update your profile information.

By default, WordPress will use your username next to your blog posts and comments. You would want to replace it with your full name or nickname. See our article on how to add or change your full name in WordPress.
You would also want to provide your website link. Other plugins may also add their own custom fields to your user profile like social media links.
Lastly, enter a short bio of yourself. This would give your users a quick introduction and help them learn more about the author behind the articles.
16. Upload Favicon and Site Icon
Favicon or Site Icon is the tiny image that appears next to your website title in the browser. It helps your users identify your website and increases brand recognition among your most frequent visitors.

First, you will need to create an image of exactly 512×512 pixels in dimensions and save it in png, jpeg, or gif format.
After that, you need to visit Appearance » Customize and click on the ‘Site Identity’ tab. Under the ‘Site Icon’ section click on the ‘Select File’ button to upload your favicon.

For more details, see our article on how to add favicon and site icon in WordPress for step by step instructions.
17. Change WordPress Email Address
Most users add their own email address when installing WordPress. This means their first user profile and their website’s email address are the same.
To change this you can go to Settings » General page and enter the new email address you would like to use for the website.

Make sure that the new email address is active, as WordPress will send a confirmation email to that address.
You can use any email address here. However, it would be best to use an email address that shows that this address is for automated emails sent from your website.
If you want to use email accounts using your own domain name, then please see our guide on how to create a free business email address for your WordPress website.
18. Setup Your WordPress Theme
The next step is to setup your WordPress theme. Most WordPress themes come with different features and customization options. However, there are some basic settings that are the same in all WordPress themes. In fact, they are common among most websites on the planet.
Let’s start with setting up navigation menus. It is the links menu that usually appears in the header section. It contains links to different areas of your website.

For detailed instructions, see our beginner’s guide on setting up navigation menus in WordPress.
Next, you would want to add widgets to your WordPress. Widgets allow you to add different blocks to your website’s sidebar or widget ready areas.
By default, WordPress will display a few default widgets in your primary sidebar. You would want to rearrange them or add other widgets. Your theme may also come with its own custom widgets for social media and other features that you would want to use.
For detailed instructions, see our beginner’s guide on how to add and use widgets in WordPress
Your theme may also include plenty of other options like color schemes, layout choices, header styles, and more. Explore these options and set them up to your own liking.
- Sale
Connect 365/7/24 Hourly Support
Original price was: $120.00.$99.00Current price is: $99.00. - Sale
Connect Auto-Pilot for WordPress Content Management
Original price was: $599.00.$499.00Current price is: $499.00. - Sale
%22%20transform%3D%22translate(1.8%201.8)%20scale(3.63281)%22%20fill-opacity%3D%22.5%22%3E%3Cpath%20fill%3D%22%23c2ffee%22%20d%3D%22M204.4%20130.6l1.2%2072-158%202.8-1.2-72z%22%2F%3E%3Cellipse%20fill%3D%22%23c4ffef%22%20cx%3D%22122%22%20cy%3D%2272%22%20rx%3D%2283%22%20ry%3D%2235%22%2F%3E%3Cellipse%20fill%3D%22%23beffea%22%20cx%3D%2265%22%20cy%3D%22126%22%20rx%3D%2235%22%20ry%3D%2256%22%2F%3E%3Cellipse%20fill%3D%22%2388ccb5%22%20rx%3D%221%22%20ry%3D%221%22%20transform%3D%22matrix(51.92988%20-137.38378%2059.61857%2022.5353%20255%20209.3)%22%2F%3E%3C%2Fg%3E%3C%2Fsvg%3E) Select options This product has multiple variants. The options may be chosen on the product page
Select options This product has multiple variants. The options may be chosen on the product pageConnect WordPress Maintenance Plans
$99.00 – $224.00
Related Articles